Saturday, March 24, 2012

Project Life Weeks 8 + 9

Here's a look at weeks 8 & 9 for me.


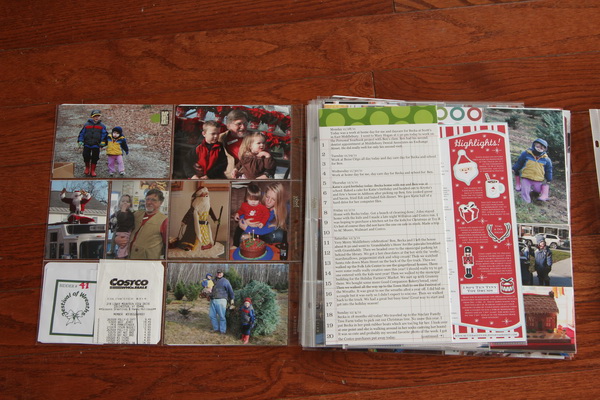
Week 8  was Monday 1/16/12 - 1/22/12. On the first page this week I tried something new and used to vertical photos to make one horizontal 4x6. I did that for all 4 photos on this page. I think it worked out really well and is another great way for me to include more photos.  There is one insert this week that is 8.5 x 11 and includes an C-8 kindergarten update on the front. The back (shown below) is a MESA newsletter that shows the money made from the read-a-thon this year. I thought it might be interesting in years to come to look at this information. 


Another new thing I did this week, (I think it's the first time I've done it) I printed 2x3 or 1/4 of a 4x6 photos on put them on half of a 4x3 space. Again it allows me to include more photos. I really like how this week turned out! I was worried that they would look too small but I don't think that's the case at all!

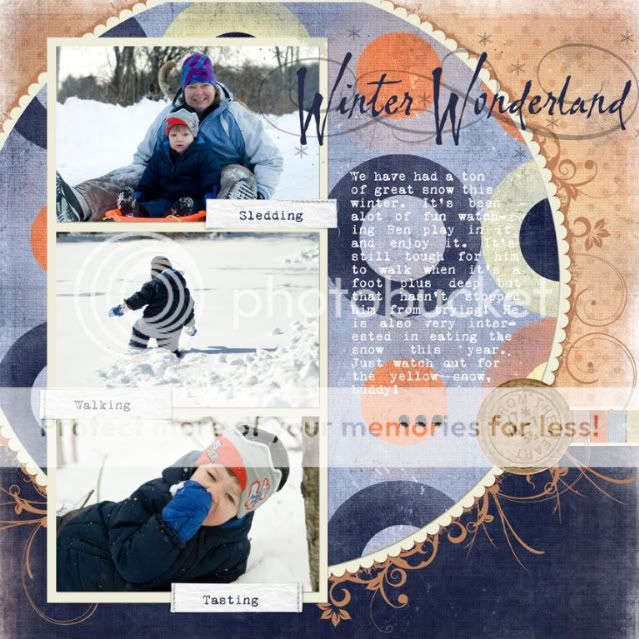
Here is Week 9 for me which was Monday 1/23/12 - 1/29/12.


I wanted to the tell the longer story of trying to get the toy corner organized. So I included a 6x12 insert this week and included photos and journaling on it. I also included some digital embellishments. I created the whole thing in Photoshop and this time made sure to keep my photos on it at 4x3 then I printed the base w/o photos on matte photo paper and then printed the photos on 4x6 glossy paper and then adhered them to the base. I really like this method. It looks a little bit more like scrapbooking with the different layers and with the photos being on different paper. It probably shouldn't matter too much for this album because no one will ever notice and it takes more time to do but I do love the result. So I think I'll keep doing it this way going forward.


Above a close up of just the insert and below is the close up of the back. I did print the base at 8.5x6 and then added as strip of patterned paper to make up the total 12" of height.


The back of the 6x12 insert includes the journaling for the week and more photos that I wasn't able to fit anywhere else.


Above is the last page of week 9. I included a filler card from the core kit I have. I need to add in some more of these, I love the way it fits in! I have hard time weeding out photos though! I went to one of Katie's basketball games and I included my "admit one" ticket with journaling on it. I like that I remembered to include this!

So that's a look at weeks 8 & 9 for me. I can't tell you enough how much I'm loving this project! Hoping to keep up with it for the whole year! I just love to look at this and love that the kids like to look through it too!

Project Life Weeks 5, 6 & 7

Here a look at Week 5, 12/26/11 - 12/31/11 for me. No inserts for me this week! I remember being a little worried about not having enough photos for this week after the last couple of weeks but it was nice not to have so many! I really like how this week looks!


I created another 4x6 vertical title card from pieces of the digital Turquoise kit. I also used the digital versions of the 3x4 journaling cards to type my journaling up in Photoshop before printing. Another new thing I did this week was to add some text directly to my photos in Photoshop.  I purchased some the Ali Edwards's kits of words and sayings and I'm very happy with the way they came out. I do think I went a little bit overboard though. Not every photo should have text on it! Too distracting! Another new idea I tried this week was to create little handwritten journaling tags by punching out tags from the grid journaling card with the Stampin' Up! Decorative Label punch. I would write my little notes and then cut off the extra and adhere the tag directly to the photo! I love this look and will definitely continue this on in the album. I love the text on the photos too but I'll try to use it a little bit more sparingly.


Here is a look at Week 6, 1/1/12 -1/7/12 for me.  More of the same design elements from last week, I made the 4x6 vertical title card. I added the Decorative Label punch tags with little journaling notes. I did not add any text to the photos this week. I think it was just of matter of forgetting to after I selected the photos and before I printed them. One thing I did do differently this week was to hand write my journaling on two 4x3 cards from the Core Kit. I tired to limit my journaling a little bit this week. In previous weeks I was spending a lot of time writing about what we did each day of the week. I decided that was really what I wanted to include every week. It was pretty time consuming. Also, some weeks (probably most weeks) I just want to talk about the highlights of week or just one story from the week. I'll see how this goes in the weeks to come.


Here's a look at Week 7, 1/8/12 - 1/15/12 for me. I included an 8.5x11 insert this week. Ben's teacher sent home this great page with two photos she took of him with a handwritten note and this was just the sort of special thing I like to include with my photos of the week. Something new for me this week, well sort of, I included some none photo memorabilia, part of a cake mix box and part of a nutty bar box. Not sure I like this short of thing but I'm giving it a try! I also included a 4x3 non-journaling design card.


Here is a look at the back side of the 8.5x 11 insert. I included one of the weekly letter we get home from Ben's teacher. It's an update letter of what they have going and and what they are working on. On the right side I used a title card from the Core Kit. I got a little crazy with the text on my photos on this page. Every photo has text on it. I think it's a little bit too much. I think this page prompted me to start sketching out my weeks on paper going forward and deciding from there which photos should have journaling. I love the look but not on every photo!

So this is what I have photographed so far. I'll post more as I get time!

Friday, March 2, 2012

Project Life Week 4

Here's a look at Week 4 for me which was 12/19/11 - 12/25/11. A note about the photos, if you would like to view them larger, please click on them! This was the week that included Christmas so I had a lot of photos and journaling I wanted to include. My first insert was an 8.5x11 page protector. The front side is all journaling. I created this page in Photoshop. I used some notebook background paper and added the Christmas lights emblishments to the top and bottom. I love how this came out!


The back of the 8.5x11 insert is the letter Ben wrote to Santa this year and Santa's response on the bottom. This is the first year that Ben wrote his own letter! So excited to have this included in this album and not lost is some box somewhere .


The second insert is 6x12 and is the remainder of my journaling for the week. I did what I've done before and printed the main part 6x11 and added a strip of patterned paper to make the total size 6x12. I love the way this ends up looking!


The back of the 6x12 insert contains a copy of our Christmas card that I made this year. After this picture was taken, I added in a couple of my favorite Christmas cards to full up the space. The rest of the Christmas cards we received are stored in a Big Envelope pocket page right now, more on this later.


 The third and fourth inserts this week are Design G pocket pages. Most of the photos are from Christmas Eve and Christmas day. The journaling card on the front of the fourth insert shown above lists each of our favorite memories of Christmas Day. I wrote down Ben's but I asked him what he wanted me to write. I had John write down his own which was a great way to get a little bit of his handwriting into the album!


This is the back of the fourth insert and the last page. The last page also has the title card in it. The Title card is another vertical 4x6 card that I made from the Turquoise Digital kit. Lots and lots of photos for this week! One thing I did differently this week was to add some page embellishments. I printed out some of Michelle Coleman's (Little Dreamer Designs) Christmas tags and journaling blocks. I sized the round tags so that I could punch them out with a 1" circle punch. The other journaling tags where cut out by hand. I just added a few words here and there, where ever it struck me that I wanted to say something. Then I added in some of the circle tags. Not sure if I'm really in love with final product but I like that I tried something different and I like that this album will grow with me as I experiment and try new things. I do need to remember to keep it simple though and not to get bogged down trying to make my album fancy. It does make me happy to add some little details and spice it up some! It makes it a little bit more than just a photo album and more of a scrapbook, which is really the goal.

Friday, February 24, 2012

Project Life Weeks 2 & 3

Here a look at week two for me which was 12/5/11 - 12/11/11. My weeks are starting on Monday and ending on Sunday.

I added Design G as an insert this week. Again I had a lot of photos I wanted to include. I like that the Design G is slightly smaller than the other pocket page designs so the page behind it shows on the end. I like the idea that any inserts I include are smaller than the main pages. The title card on this page is one I made in Photoshop. I did end up buying the digital version of the Turquoise kit from Jessica Sprague.com so I could manipulate the parts of the kit to make them work for me. This does require that I spend more time than I originally thought I would to put this album together but so far I've been really thrilled with the end result. Actually I've been tickled pink and so excited after I've completed each week. I love how it's turning out! I love that I'm getting my photos off my computer and into an album that anyone can look at!

Here's the back side the insert and the second page for the week. I also made the 3 vertical journal cards in Photoshop. I re-sized the 4x3 journaling cards in the digital kit to make them 4x6. I had three cards to fill this week so I wrote out my journaling by hand. My handwriting takes up more space and I wanted to use up the space I had. You'll notice that one of my vertical 4x6 photos on the back of the insert is going the wrong direction. I figured wrong when planning my pages and ended up with an extra horizontal 4x6 so I went ahead and stuck it in even though it was going the wrong way. It doesn't bother me too much. I also included some of Becka's hair we saved from her 2nd hair cut this week.

The following is a look at Week 3 for me which was 12/12/11 to 12/18/11.

I added another 8.5x11 insert this week. The front is paperwork from Becka's 18 month Doctor's visit.

This is the back of the insert and the second page. The back of the insert has a card Ben wrote to me at school and sent in the mail. I actually used a 4x6 title card from the Core Kit this week. My journaling is handwritten again this week on a custom made 4x6 vertical journaling card and a 4x3 horizontal journaling card.

I have enjoyed mixing up the different pocket page designs each week. Week 2 I used two Design B and the insert was Design G. On Week 3, I used a Design B and Design A. I like that it's a little bit different each week. Right now my process for the week has been to open ACDsee which is what I use for viewing, some minor editing and organizing my photos and digital scrapbooking supplies. I view my photos for the week and put any I want to use into the Image basket. Then I go through the image basket and weed out any duplicates or ones I decide I don't really want to use. Then I count out my horizontal and vertical images and decide which ones I want sized 4x6 (my favorites!) and which ones I be happy with 4x3. Then I look at what I have to work with from the previous week (the backside) and pick another design that will work best for what I want to include. So far, I've used Designs A, B and D the most and that makes sense because those designs have the vertical 4x6 pockets. Sometimes it gets tricky, I usually have alot of photos I want to include and so I have to figure out how to fit them in. The easiest way is to include them in the 4x3 pockets. Or included two photos in one 4x6 pocket. When I started, I would print all of my 4x3 photos out on an 8.5x11 sheet of photo paper and have to spend time cutting them all out. Now I use Ali Edward's great tip of printing two 4x3 on one 4x6 piece of photo paper. It works great!! I created a template in Photoshop and I clip my photos to my template and them save for printing! Alot less cutting and it saves a ton of time!

I just finished up my 12 week. So I'm caught up with my album again and I'm so excited about that! I'll plan on getting some more photos posted soon!

Project Life

I don't remember the first time I heard about Project Life or what exactly finally triggered me to give it a try. I do remember following Ali Edwards blog and her journey with it last year. So in November of 2011 when new supplies became available on Amazon, I ordered a big variety pack of pocket pages, a package of design G, a package of 12x12 and a package of 6x12 page protectors, several packages of big envelopes, the dividers and a package of grid cards and got started! I didn't have a core kit at the time and put one on my Seeley Christmas exchange list. I decided not to wait for new year or a Core Kit to start and just jumped right in. My first week started on 11/28/11. My other reason for starting then was I have always wanted to do a Daily December album like Ali does and thought this might be a way to combine them both.

I decided my approach to Project Life was to take photos throughout the week of whatever struck me. At the end of the week, I'd pick my favorites and put them in the album. I was not doing a photo a day approach. I found the first week I had more photos I wanted to use than would fit into two page protectors. So the first thing I had to figure out was how to include more photos. I ended up using most of the pockets for photos. I didn't know at the time what was included in the Core Kit and what options I had for the 4x3 pockets.

Here's a look at my first week.

I did two inserts this week. The first is a 6x12 insert with journaling on the front. I print everything at home on my HP Photosmart printer that only prints 8.5x11. So to make a full 6x12 insert, I print a 6x11 and a 6x2 piece of digital paper on the same 8.5x11. Then I cut apart the pieces and attached the 2"strip of paper along the top or bottom of the 6x11 to make a 6x12. I've been very happy with the way it looks. That's what I did for this insert. I included my bidding number for the Festival of Wreaths and a Costco receipt in one pocket for some some items other than photos this week.


The above photo shows the back of the 6x12 insert which includes the rest of my journaling and the front side of my 2nd insert which is an 8.5x11. I included the flier for the Merry Middlebury Celebration.

The above photo shows the final look at the first week with back side of the 8.5x11 insert containing Ben's read-a-thon certificate and the final page of photos. When I started I didn't know what was included in the core kit or the direction of the title cards. I did get the Turquoise Core Kit from Trudy for Christmas (thanks Trudy!) The only problem I found was everything in the Core Kit was designed for 4x6 horizontal title cards and vertical 4x3 journaling cards and I was not doing things the traditional way. I did add a kit title card after I got the kit for Christmas. It is going the wrong direction but that hasn't bothered me too much. I didn't do any corner rounding or adding any embellishments this week. Although when I got the kit, I did add a sticker and arrow to the picture of Ben and Becka holding hands on the first page.

I'll be back with more looks at my other weeks and my project life album in later posts!

Thursday, February 19, 2009

Favorite Photo for a Chance to Win a Free Class

Read this post for all the details.

So the question is "What is one of your very FAVORITE photos of a person that you’ve ever taken? Describe it, or better yet, post it and add the link here, and then tell me what it is about the pic that makes your heart sing."

So here is one of my very favorite photos of Ben that I've taken.


It was taken in 9/29/07. And I just love this photo! It does make my heart sing! I love the angle. I love the reflection of his hand in the puddle. I love the colors. I love that I got right down laying on the ground on my belly to get the shot. I love the lighting and the way his hair is blowing in the breeze! So thanks Jessica for giving me the excuse to share it!

Friday, February 13, 2009

Getting some Digital Scrapbooking Done

I've finally taken some time the last few days to get back into the digital scrapbooking again. Here is the first one I did. It uses a free template from Jessica Sprague. If you are interested you can find if here.


I used Jessica Sprague's free Template+, Title is from Michelle Coleman's Winter Wonderland Kit and all the papers are from Jen Wilson's New Attitude Kit.

The second one I did is from the Type+Writer Class I signed up for last year at Jessica Sprague.com and then didn't have time to do. This is the first layout. It is also a template and then I used the paper from the kit that came with the class. You can read the details about this class or sign up here.


I'm pretty happy with the way both of them turned out. I'm also really loving digital scrapbooking with templates. They make it so easy and I don't have to fret about the design which is a weak area for me. I always spend way too much time worrying about it and second guessing myself. I'll have to start collecting templates now too!

I also figured out today with the help of this blog post how to get larger pictures on blogger. Pretty cool huh?